Pre-Possession Inspection Checklist for New Apartments 2026
Professional inspection fees are indicative. RERA provisions referenced are as applicable in 2026 — consult your builder agreement and a legal advisor for the specific defect-rectification process for your project.
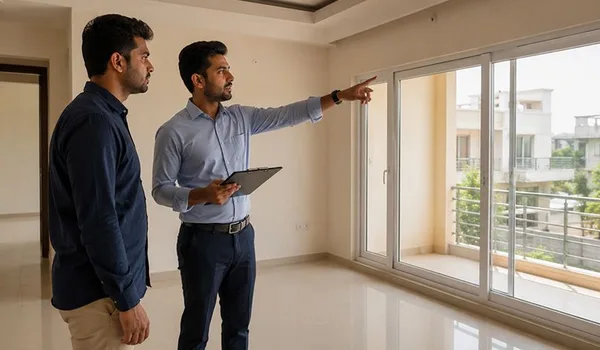
Taking possession of a new apartment on Sarjapur Road is the moment a multi-year purchase finally becomes a home — and also the last practical opportunity to catch defects before you sign the handover letter and the clock on the builder's warranty begins. Most buyers walk through the flat in 20 minutes, check that the lights come on, and sign. Buyers who have been through the process before take longer, bring tools, and document everything. This checklist covers what to look for across seven inspection areas, your legal rights under RERA, and the documents you must collect before you leave with the keys.
Pre-Possession Inspection — Seven Areas at a Glance
| Inspection Area | Key Checks | Common Issues Found |
|---|---|---|
| Structure and finishes | Cracks, seepage marks, plaster, floor level | Hollow tiles (tap test), hairline cracks at junctions, uneven floors |
| Electrical | All sockets live, MCB box, earthing | Dead sockets, wrong MCB rating, no earthing at sockets |
| Plumbing and sanitation | Water pressure, drain speed, no seepage behind tiles | Low pressure, slow drains, seepage marks behind bathroom tiles |
| Doors and windows | Open/close without binding, gaps, locks, glass | Warped frames, missing weather seals, loose handles, door-frame gaps |
| Kitchen | Platform level, sink drain, exhaust duct, utility points | Unlevel platform, blocked exhaust duct, missing washing-machine point |
| Common areas and parking | Lifts commissioned, lobby finish, parking marking | Lift not yet certified, lobby finishes incomplete, parking bay unmarked |
| Handover documents | OC, allotment letter, NOC, warranty card | OC not yet issued, builder dues not cleared, no defect-liability letter |
Your Legal Right to Inspect Before Possession
Under the Real Estate (Regulation and Development) Act, you are entitled to inspect the apartment before you pay the final possession balance and sign the handover letter. Section 14(3) of RERA makes the promoter liable to rectify structural defects and defects in workmanship, quality or services reported by the allottee within five years of the date of possession, at no additional charge. This five-year defect liability period is one of the most significant buyer protections in the Act, but it runs from possession date — so what you document before you sign determines what falls within that window.
The procedure for logging a snag list varies by builder. Most require you to submit defects in writing (ideally with photographs) to the project office before or alongside signing the handover letter. Get a written acknowledgement that your snag list has been received. Do not sign a handover letter that includes language waiving your right to claim defects after possession unless all material issues have already been resolved. For project-specific RERA filings and complaint mechanisms, the Karnataka RERA portal provides project-level details and a complaint-registration interface.
Structure and Finishes Inspection
Start with the walls, ceiling and floor. Run your hands along plastered wall surfaces and look for bulges, cracks (hairline cracks at corners and junctions of different materials are common; wider or diagonal structural cracks are more serious), and seepage stains (yellow or brown marks, especially near external walls, plumbing chases and window frames). Check the ceiling for the same.
For floor tiles, use the tap test: knock every tile with your knuckle or a small tool — a hollow sound indicates a poorly bonded tile that will eventually come loose. Check grout lines for uniformity and completeness. Bring a spirit level and place it across several floor tiles to check for levelness, especially in the kitchen and wet areas where a slope is required toward the drain but an unlevel platform or floor is a defect. Also check that tile patterns meet at corners cleanly and that cut tiles at edges are straight.
Electrical System Inspection
Carry a plug-load tester (a small device that plugs into a 3-pin socket and confirms live, neutral and earth connections). Test every socket in every room, including those behind where appliances will be placed — an inaccessible dead socket is hard and expensive to fix post-occupation. Check every switch for the light or fan it is supposed to control. Look at the MCB (miniature circuit breaker) box: the MCBs should be labelled by area or circuit, and the ratings should match the specification in your BBA (typically 6A for lighting circuits, 16A for plug points, 20A or 32A for air conditioners).
Check that the earthing wire (green-yellow) is connected at the MCB box and at visible sockets. A missing earth connection is a safety defect, not a cosmetic one. Verify that the electricity meter has been provisionally commissioned and that the meter number matches your unit designation in the builder's records. These details become relevant when you apply for a permanent BESCOM connection after possession.
Plumbing and Sanitation Inspection
Open all taps in all bathrooms and the kitchen at the same time and observe the water pressure. Pressure should be adequate at the uppermost floor; if it is insufficient, record it. Allow water to fill each basin and sink, then time how long the drain takes to clear — a slow drain indicates a partial blockage or a drain slope issue that is far easier to resolve pre-occupation than after tiles are in place.
In bathrooms, use the tap test on wall tiles behind the cistern, around the shower area and below the window. Seepage behind tiles often shows only as a hollow sound and a slight discolouration, not yet as a visible stain. Flush every WC and check for fill speed and proper sealing. Check that all CP (chrome-plated) fittings — taps, showers, flush handles, towel rails — match the brand and specification in your BBA. Check under kitchen and bathroom sinks for any dripping from the waste pipe connections. Record any seepage marks on external-facing walls in wet areas.
Doors, Windows and Glazing
Open and close every door and window. They should move without binding, sticking or rattling. Check the frame-to-wall joint for gaps (a gap wider than 2–3 mm on an external wall allows moisture ingress). Test every latch and lock mechanism. On main and bedroom doors, check the door-stopper is fitted and that the door does not swing past 90 degrees and hit the wall. Check window handles, sliding mechanism and mosquito mesh (if specified).
For glazing, check glass panes for chips, cracks or distortion at the edges. Check the glazing seal (the rubber or silicone bead around the glass) for continuity — a broken seal on an external window allows rain ingress. If the specification includes double-glazed units, tap the glass gently: a fogging or cloudiness inside the sealed unit indicates a failed hermetic seal that requires glass replacement, not just resealing.
Kitchen and Utility Connections
Place a spirit level on the kitchen counter platform in multiple positions — it should be level across its length and slightly sloped toward the sink at the back edge. An unlevel platform causes water to pool and is the most common post-possession kitchen complaint. Check that the sink is properly sealed at its perimeter where it meets the counter and that the waste pipe below runs cleanly to the drain point without sagging.
Verify the gas pipe point (if the specification includes a gas connection), the washing machine or dishwasher hot/cold water points and the drain connection point in the utility area. Check the exhaust duct for the kitchen chimney: it must run to the exterior (typically through the external wall or up through the shaft to the terrace). A duct that terminates inside a false ceiling is a serious specification shortfall. Check electrical points in the kitchen against the specification — dedicated 16A points for the refrigerator, microwave, and other heavy appliances should each be on their own circuit.
Documents to Collect at Handover
The inspection of the flat itself is only one part of the possession process. Before you sign the handover letter and leave with the keys, collect the following documents and verify them:
- Occupancy Certificate (OC): Issued by the BBMP or BDA, this confirms the building is complete and legally fit for habitation. Do not accept possession without an OC — living in a building without OC can affect your insurance, utility connections and resale. A completion certificate (CC) may be issued in some cases as an interim document; confirm its status with your legal advisor.
- Allotment letter and Agreement to Sell: Your original copies of both documents, signed and stamped. If these are in the custody of your home-loan bank, obtain certified copies from the builder for your own records.
- NOC from the builder: A written No Objection Certificate confirming no outstanding dues — maintenance arrears, parking charges, club membership — on your specific unit at the time of possession.
- Defect liability or warranty letter: A written confirmation from the builder of the five-year RERA defect liability period, the process for reporting defects, and the contact details for the builder's post-possession service team.
- Utility connection letters: BESCOM (electricity) and BWSSB (water/sewerage) connection letters for your unit. These are needed to apply for permanent connections after possession.
- Maintenance schedule and contact: Details of the maintenance agency (builder's own team or a third-party facility management company), the monthly maintenance charge applicable to your unit, and the process for logging maintenance complaints.
- Society/association documents: If a residents welfare association or apartment owners association is already constituted, the registration certificate and your membership letter.
At a preview session for Godrej Verano on Sarjapur Road in July 2026, buyers who had already taken possession of apartments in other projects on the corridor noted that hollow tiles and an unlevel kitchen platform were the most common issues they had missed before signing the handover letter. Both are straightforward to detect on inspection — a tap-test for tiles takes five minutes per bathroom — but difficult to rectify once occupation begins and furniture is in place. The legal checklist for documents prior to booking is covered in the apartment buying checklist; this guide covers the stage that follows — what to check when the keys are in your hand.
Frequently Asked Questions
1.Do I have a legal right to inspect my apartment before taking possession?
Yes. You are entitled to inspect the property before paying the final possession balance. Note any defects in writing before you sign the possession handover letter. Under RERA, the builder must rectify structural defects and workmanship defects reported within five years of possession at no extra cost to the allottee. Do not sign a handover letter that includes language waiving your right to raise defects unless all material issues have already been resolved.
2.Can I refuse possession if I find defects?
You may withhold the final balance until significant defects — structural cracks, non-functional plumbing or electrical points, missing fittings specified in the BBA — are rectified. Minor cosmetic issues are typically logged in a snag list and addressed within 30 days. Consult your Builder Buyer Agreement for the exact procedure, and document all defects in writing with photographs, submitted to the builder before signing the handover letter, with a written acknowledgement from the builder that the list has been received.
3.Should I hire a professional home inspector?
It is strongly advisable, particularly for electrical and structural checks. A professional inspector brings tools — moisture meter, clamp meter, spirit level, plug tester — that most buyers do not carry. The cost is typically ₹3,000 to ₹8,000 (indicative) for a 2 or 3 BHK apartment, negligible relative to the purchase price and the potential cost of rectifying a defect that was missed at possession.
4.What is the defect liability period under RERA?
Under Section 14(3) of the Real Estate (Regulation and Development) Act, the promoter is liable to rectify structural defects or defects in workmanship, quality or provision of services reported by the allottee within five years from the date of possession, at no additional charge. This applies to RERA-registered projects. Report defects in writing with photographic evidence and retain proof that the complaint was delivered to the builder.
5.What documents must the builder hand over at possession?
At minimum: the Occupancy Certificate (OC) or completion certificate from the BBMP or BDA; the allotment letter and Agreement to Sell; a No Objection Certificate from the builder confirming no outstanding dues; a warranty or defect liability letter citing the RERA five-year period; the maintenance schedule and agency contact details; BESCOM and BWSSB connection letters for your unit; and society or association documents if the residents welfare association is already constituted. Retain originals of all documents.
Conclusion
A pre-possession inspection is the last contractual checkpoint before the builder's liability shifts to the RERA five-year defect warranty period. The areas that most often surface issues — tile bonding, kitchen platform level, electrical earthing, plumbing seepage behind tiles and window frame sealing — are straightforward to detect on a careful walkthrough but difficult and disruptive to repair once occupation begins. Take the time, bring tools or a professional inspector, document everything in writing, and collect the full set of handover documents before you sign. For current floor plan and specification details for Godrej Verano, see the price page and floor plans, or speak to the team directly.
More From the Blog